Window handles play a crucial role in both the functionality and aesthetics of your home. They not only allow you to open and close windows effortlessly but also add to the overall design and security of your living space.
For instance, a well-designed handle can complement your interior decor, while a sturdy handle can provide added protection against break-ins. Over time, however, these handles can wear out or break, necessitating replacement to maintain both the efficiency and appearance of your windows.
In this blog post, we’ll guide you through easy steps for window handles replacement, making it a straightforward DIY project even for beginners. We’ll cover everything from selecting the right tools and handle types to the actual steps of removing the old handle and installing the new one.
By the end, you’ll feel confident in carrying out this task on your own, ensuring your windows function smoothly and look great for years to come. So, whether you’re a seasoned DIY enthusiast or just starting, read on to learn how to give your window handles a fresh update.

Understanding the Need for Replacement
Signs That Indicate Window Handles Need Replacement
Knowing when to replace your window handles is essential to maintain your home’s functionality and aesthetics. Here are some telltale signs that it’s time for a replacement:
- Difficulty in Operation: If the handle feels stiff or hard to turn, it may indicate that the internal mechanisms are worn out or that a buildup of dirt and grime is making it difficult to operate smoothly.
- Visible Damage: Cracks, rust, and other signs of noticeable wear and tear can make your windows look bad and also make them less safe and effective. Damaged handles might break off or fail to lock properly.
- Loose Handles: Handles that wobble or feel insecure can be a sign that the screws or fastenings have loosened over time. It can make it hard to open and close the window properly so that it might stay partly open or closed.
- Misalignment: Handles that don’t align correctly with the window latch can prevent the window from closing or locking correctly. This misalignment can happen because the window frame is warped or moving or the handle is worn down over time. It can also affect the insulation of your home, leading to drafts and higher energy bills.
Regularly checking and maintaining your window handles can help ensure that your windows continue to function smoothly and look their best.
Importance of Timely Replacement to Avoid Further Damage
Ignoring faulty window handles can lead to several issues:
- Compromised Security: Damaged handles can make your home more vulnerable to break-ins, as they may not lock properly, providing easy access for intruders.
- Energy Inefficiency: Poorly functioning handles can affect the sealing of your windows, leading to drafts and higher energy bills. Your HVAC systems have to work harder to keep your home at a comfortable temperature because of this waste.
- Increased Wear: Continuing to use damaged handles can cause further damage to the window frame or locking mechanism. Over time, this can lead to more costly repairs or the need for complete window replacement.
If you keep up with window handle maintenance and repairs, you can avoid these problems. It will protect your house, keep it safe, and save you money on energy costs.

Preparing for Window Handles Replacement
Tools and Equipment Needed for the Task
Before you start the repair process, make sure you have the following tools and equipment on hand to make sure everything goes smoothly:
- Replacement window handles: Make sure they match the specifications of your current windows.
- Screwdrivers (both flathead and Phillips): These will be necessary to remove and install screws of different types.
- Allen wrench set: Useful for dealing with hex screws that might be present.
- Tape measure: It is essential to take accurate measurements to ensure the new handles fit perfectly.
- Safety gloves: Protect your hands from potential injuries during the replacement process.
Double-check that you have all these items on hand before beginning the project to avoid interruptions and ensure smooth operation.
Safety Precautions to Keep in Mind
When you do a do-it-yourself project, safety should always come first to make sure you don’t hurt yourself and get the job done right. Here are some necessary precautions to consider:
- Put on safety gloves to keep your hands safe from sharp edges, splinters, and other things that could hurt you. It will help keep you from getting cuts and scrapes while working with different materials.
- Make sure the window is securely closed to avoid accidents such as falls or objects accidentally being dropped out. Secure windows also help prevent drafts that could interfere with your work.
- If replacing handles on higher floors, use a stable ladder. Ensure that the ladder is on a flat surface and properly positioned to avoid tipping over. It’s also beneficial to have someone hold the ladder for added stability.
If you follow these safety tips, your do-it-yourself job will go more smoothly and safely.

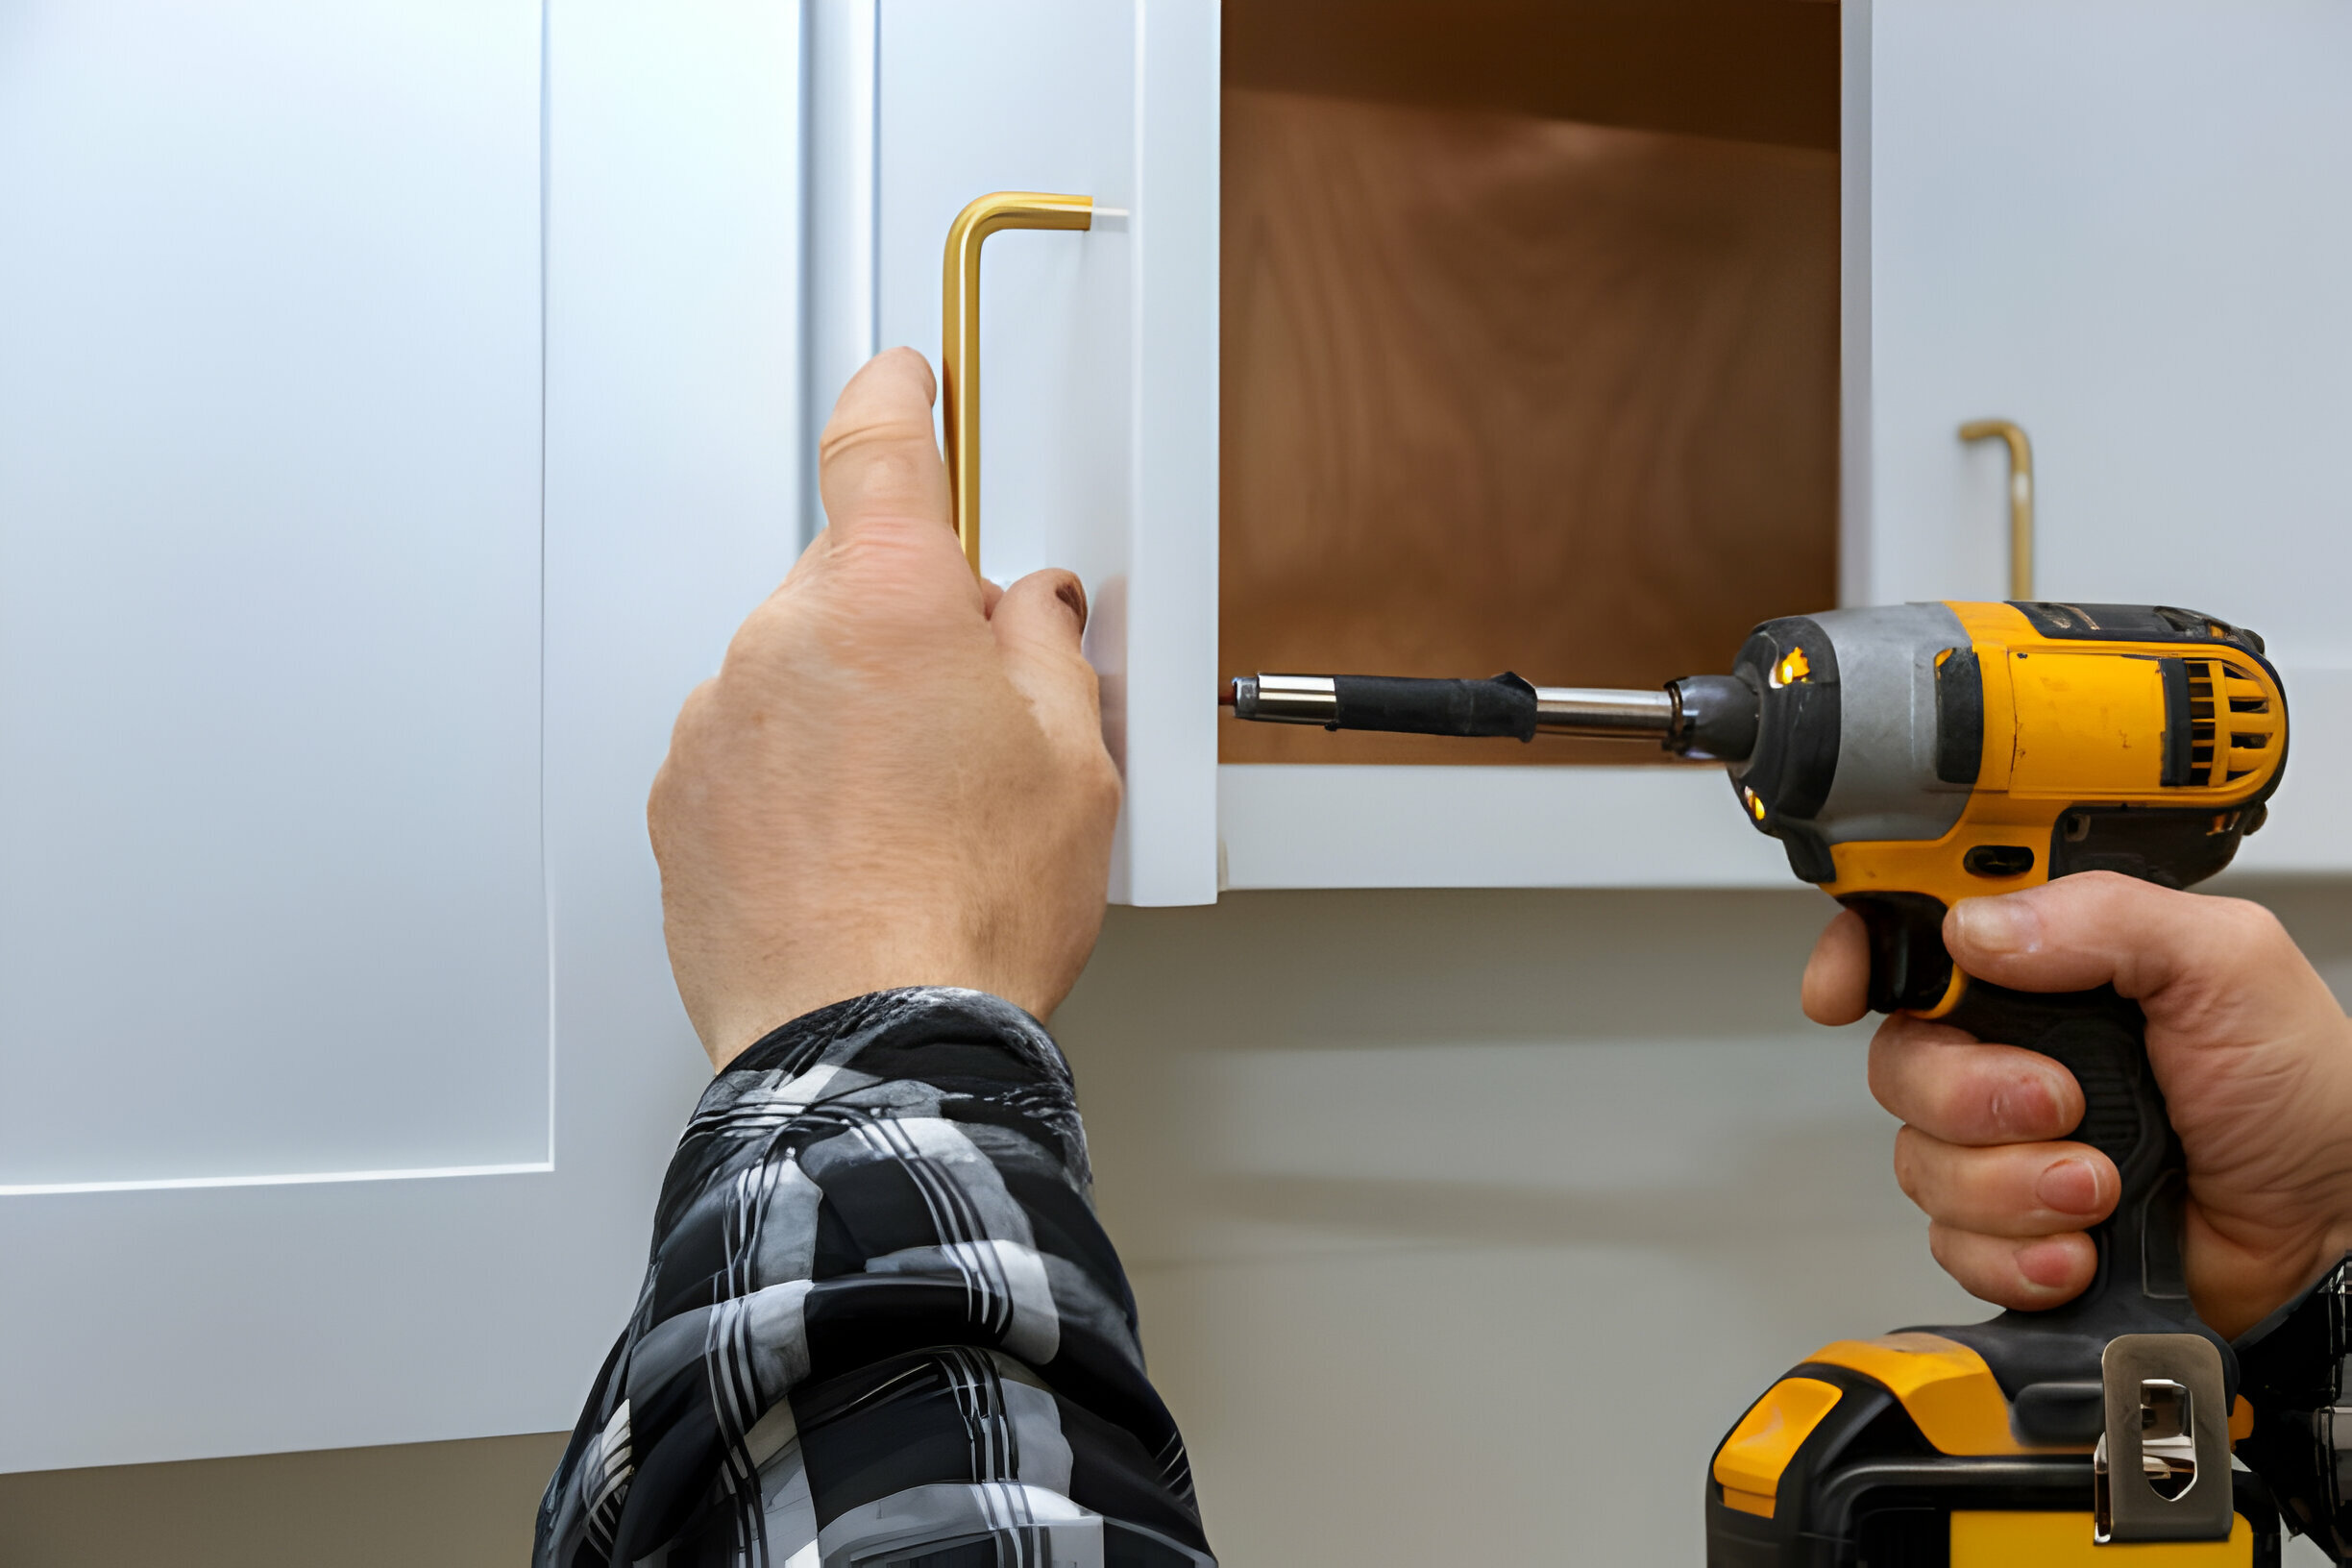
Step-by-Step Guide for DIY Replacement
Removing Old Handles
- Identify the Screws: Carefully locate the screws holding the handle in place. These screws are typically found on the base of the handle or the sides and might be covered by small caps or plugs.
- Remove the Screws: Use the appropriate screwdriver, usually a Phillips or flathead, to remove the screws. Ensure you keep the screws in a safe place, as you will need them for the new handle.
- Detach the Handle: Gently pull away the old handle from the window frame. If it feels stuck, wiggle it slightly or use a flat tool to pry it away carefully to avoid damaging the frame.
Choosing the Right Replacement Handles for Different Window Types
Different windows require different types of handles based on their design and functionality. Here’s how to choose the right one:
- Casement Windows: These windows open outward like doors, so look for crank handles that make them easy to open and close without getting in the way of the room inside.
- Sliding Windows: These windows slide horizontally along a track. Opt for lever-type handles, which provide a sturdy grip and smooth operation.
- Awning Windows: These open outward from the bottom, creating an awning-like effect. Select compatible pull handles designed for easy access and operation, ensuring they can withstand the elements.
Installing the New Handles Securely
- Position the New Handle: Carefully align the new handle with the screw holes, ensuring it fits snugly against the surface. Double-check that the handle is positioned correctly.
- Insert the Screws: Secure the handle by inserting the screws into the aligned holes. Tighten each screw with a screwdriver, making sure they are firmly in place but not too tight so you don’t damage the surface or the handle.
- Test the Handle: Once the handle is in place, make sure it works smoothly and safely by testing it. Open and close the handle a few times to confirm it functions appropriately and feels stable. Make any necessary adjustments if there is any looseness or resistance.

Tips for Maintenance to Prolong Handle Life
Regular Check-ups
Inspect your window handles regularly to ensure they are in good condition. Look for signs of wear, such as cracks, rust, or discoloration, which may indicate that the handles need attention. Tighten any loose screws to prevent further damage and ensure the handles function properly.
It’s also a good idea to clean the handles thoroughly, removing any dirt or grime that may have accumulated. Use the proper lubricant on the moving parts to make them last longer and keep the machine running smoothly. By taking care of your window handles on a regular basis, you can avoid having to pay for expensive fixes or replacements in the future. It will keep your windows safe and valuable for a long time. Additionally, this proactive approach supports the overall aesthetic and safety of your home.
Best Practices for Cleaning and Maintaining Handles
- Regular Cleaning: Use a wet cloth to clean the knobs and get rid of fingerprints and dirt. For tough spots, use a gentle soap solution and rinse thoroughly with water.
- Lubrication: Apply a light lubricant, such as silicone spray or a drop of household oil, to the moving parts of the handle to keep them functioning smoothly and prevent rust.
- Avoid Harsh Chemicals: Use mild cleaning solutions like diluted dish soap to avoid damaging the handle’s finish. Avoid abrasive cleaners and solvents, as they can scratch or tarnish the surface.

Benefits of Professional Replacement
When to Consider Professional Help Over DIY
While replacing window handles can be a simple DIY task, there are times when professional help is advisable:
- Complex Installations: If the window mechanism is intricate, involving advanced locking systems or custom components that require specialized knowledge.
- Multiple Replacements: This involves replacing a large number of windows at once, especially in bigger homes or businesses where accuracy and regularity are important.
- Lack of Tools/Skills: If you need to be sure of your DIY skills or have the right tools, like suitable screwdrivers or alignment tools, you might not put something correctly, which could cause problems in the future.
- Warranty Concerns: If your windows are still under warranty, professional installation might be required to avoid voiding the warranty.
Considering these factors can ensure that the job is done right and that your windows continue to function smoothly and securely.
Advantages of Hiring a Professional for Handle Replacement
- Expertise: Professionals make sure that every part of the job is done carefully and precisely because they have the proper training and years of experience.
- Efficiency: With their advanced skills and tools, professionals can complete the job much faster and more efficiently than someone without their expertise, saving you both time and effort.
- Warranty: Professional services often come with comprehensive warranties, providing peace of mind by guaranteeing the quality of their work and offering protection against future issues.
Conclusion
Window handles may seem like minor components, but they significantly impact your home’s functionality and aesthetics. Timely replacement and regular maintenance can help you maintain a secure and efficient home. Whether you choose to DIY or hire a professional, taking action is crucial.
If this guide was helpful to you, please share it with other people or leave a review below.
—
By following these easy steps, you can tackle window handles replacement like a pro, ensuring your home remains both beautiful and secure. Happy DIY-ing!